Filter the data in your tables using conditions

Blog > Product updates > Filter the data in your tables using conditions
Filter the data in your tables using conditions
Published on 20 March 2023 • Reading time: 3 min read
If you use AntsRoute every day, your tables must contain a lot of data about your work orders or deliveries. It’s not always easy to find the information you need? That’s why AntsRoute offers filters to allow you to display only the necessary information.
In February, our team already updated the filter display to give you a better experience on the interface. To go even further, we’ve added a feature to save these filters. Ready to save time when navigating through your tables?
What filters are available on AntsRoute?
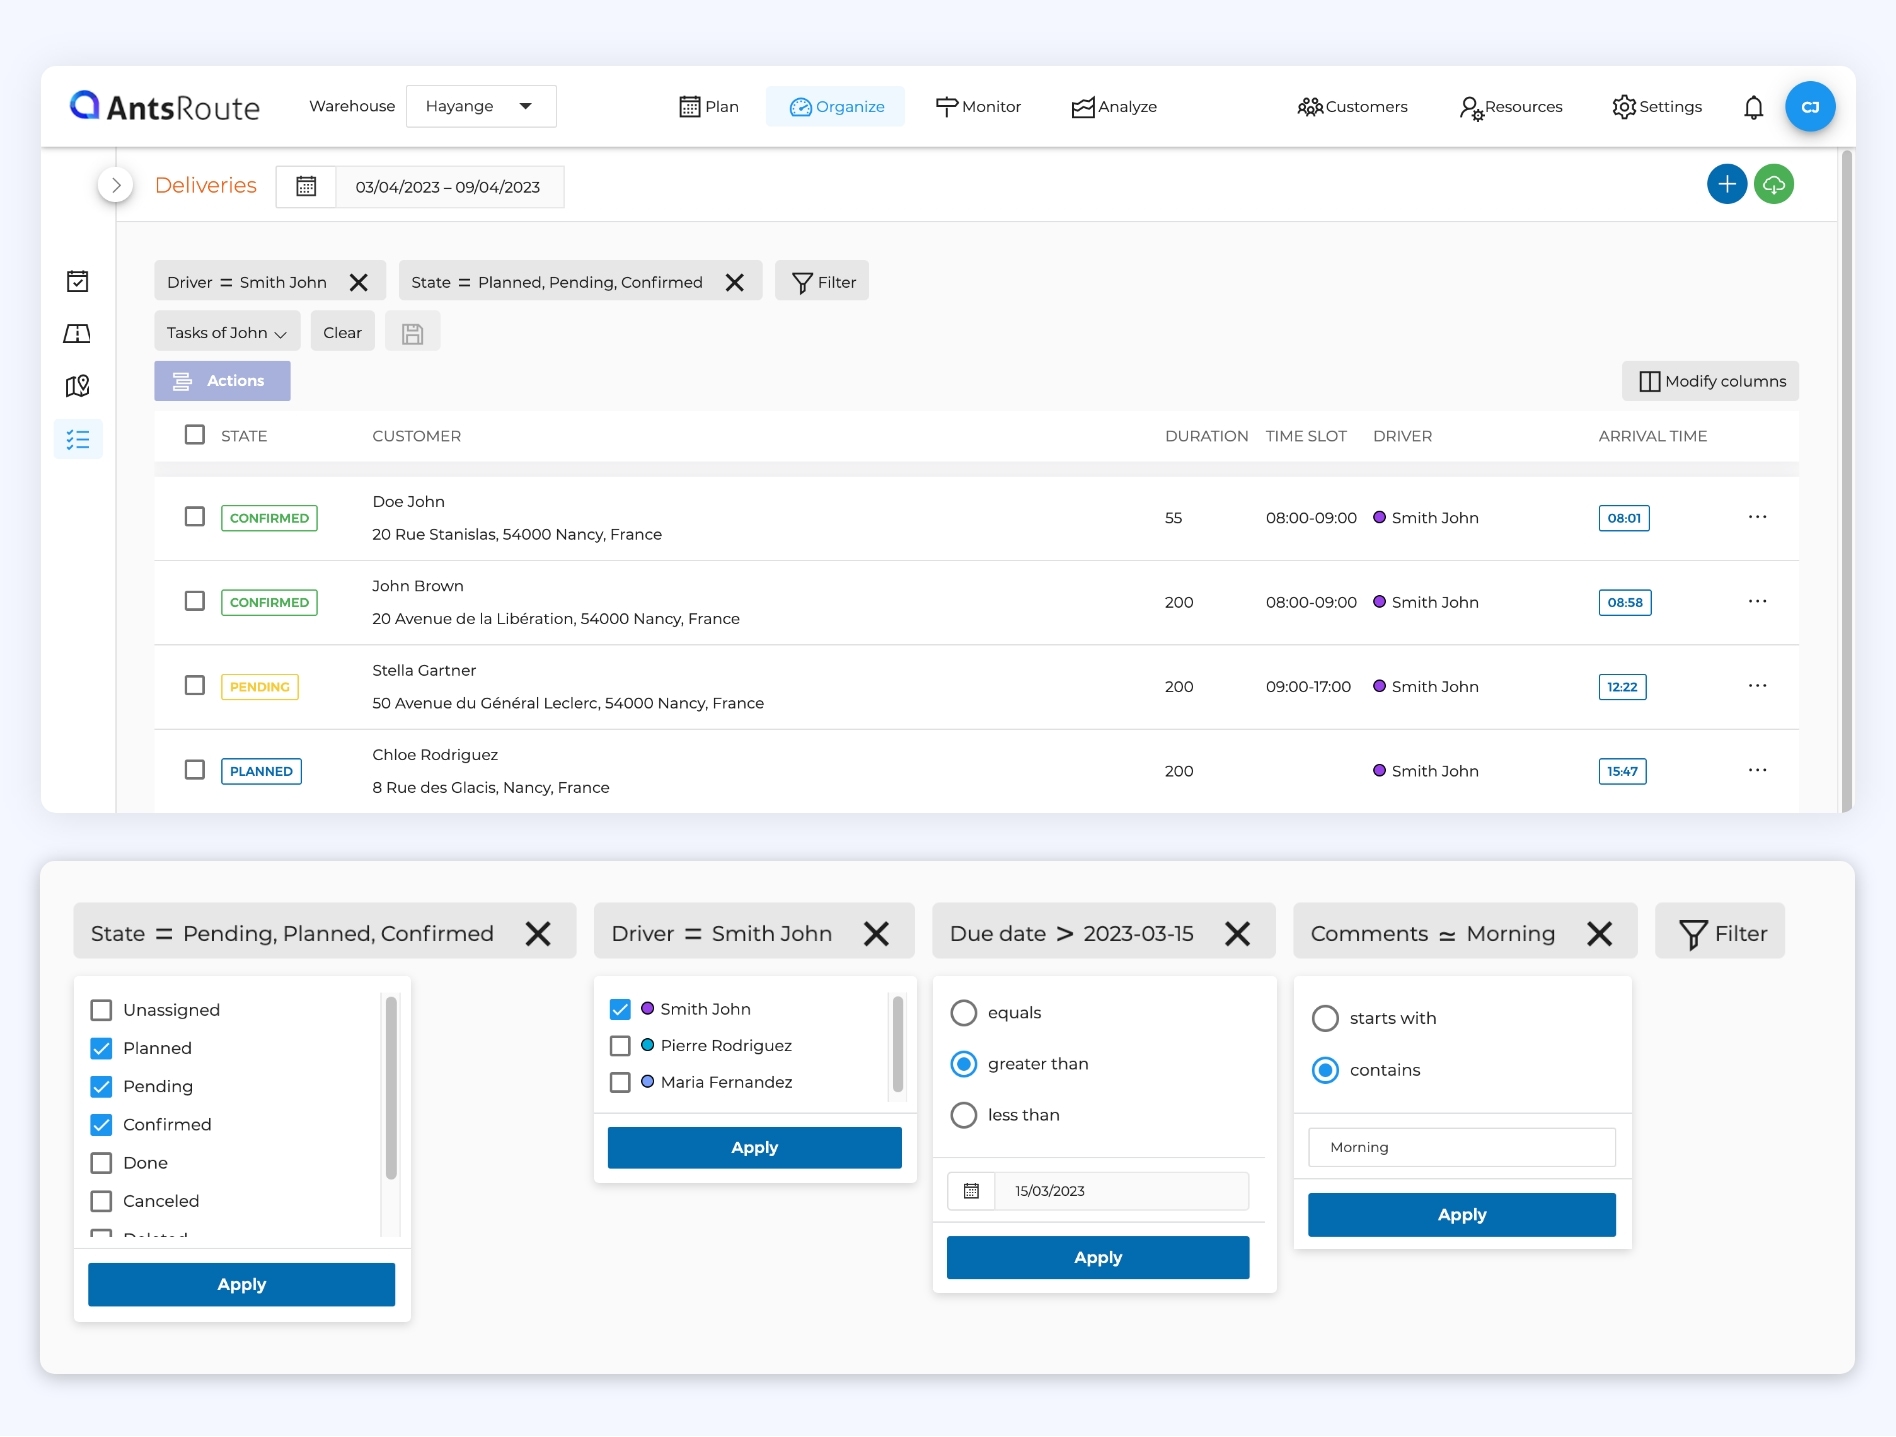
If you want to filter the information displayed in your table, you can benefit from several types of filters. Discover now the different options offered by AntsRoute.
Filters with multiple selection:
- State;
- Driver;
- Favorite driver;
- Time slot;
- Type of service;
- Skills;
- Cancel reasons.
Filter data using a search bar in the “Customers” tab:
- Customer first name.
- Customer last name.
- Customer address.
Advanced filters:
- Open date;
- Due date;
- State;
- Driver;
- Preferred driver;
- Comment;
- Done comment;
- Cancel reasons;
- Time slot;
- Type of service;
- Skill;
- Sector;
- Customer;
- Custom fields.
How to apply a filter?
It couldn’t be easier! Just follow these four quick steps:
- Click on the “Filter” button.
- Select a column.
- Choose a condition and select the values.
- Click on the “Apply” button. And voilà!
Filters with multiple conditions
Depending on your needs, AntsRoute allows you to apply several filters. The aim is to further customise the way your data is displayed. To do this, once you’ve applied a first filter, you can add a second condition. Follow the same steps as when you added the first filter: select the column by which you want to filter, the condition and the value you want to display. Finally, choose whether you want to display data that meets “All these conditions” (= AND) or “One of these conditions” (= OR). And that’s it! ✨
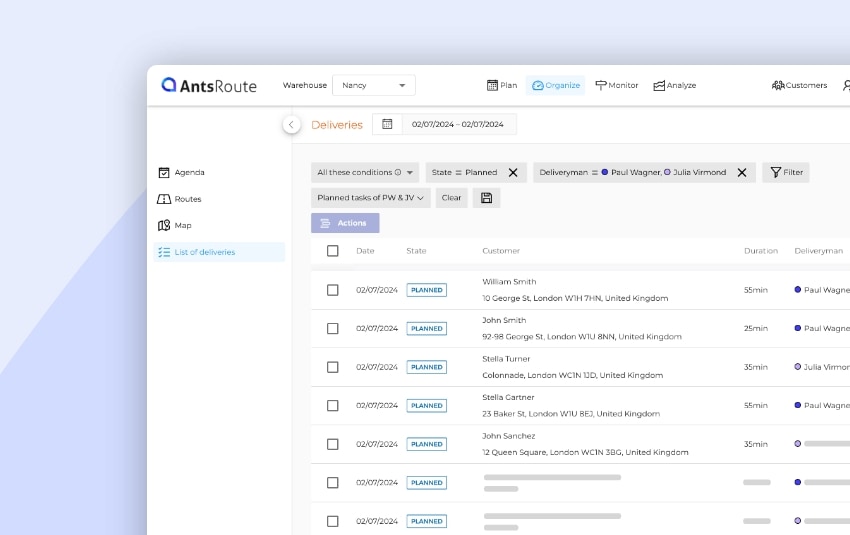
For example, if you want to display the planned, pending and confirmed work orders of the driver John Smith (AND):
- Start by adding an initial filter by selecting the “State” filter and the values “Planned”, “Pending” and “Confirmed”.
- Next, click on the “Filter” button to add the “Driver” filter and the “John Smith” value.
- Select the “All these conditions” option.
Here are the steps to follow to display planned, pending and confirmed work orders OR the work orders of driver John Smith :
- To begin with, add an initial filter by selecting the “State” filter and the values “Planned”, “Pending” and “Confirmed”.
- Next, click on the “Filter” button to add the “Driver” filter and the value “John Smith”.
- Select the “One of these conditions” option.
Save filters to quickly access data
Here is the most interesting feature! Once you have selected the different conditions you want to filter, you can save this filter for quick access in the future. To save filters, follow these steps:
- Apply filters.
- Click on the saving button.
- Enter the “Name” for this view.
- Click on the “Save” button.
Once your filter is saved, you can retrieve it by clicking on the “My filters” button. In addition, you can edit these saved filters if necessary. To do this, you need to select your filter and click on the “Filter” button to add additional conditions or on the button to remove them. When it’s done, simply click on the saving button.
To learn more about saving filters, read our support article.
Any questions? Do not hesitate to contact our support team by filling in our contact form. We would be delighted to help you!
Optimise your last-mile routes today
Free 7-day trial | No credit card required


